Guess who's back!
Did you miss me blogettes?
I missed you dearly.
What better day to come back to than Makeup Monday!
I was all prepped to write the article, then realized one of my makeup articles for my favourite beauty website Chick Advisor was published today - so that will be your makeup monday post - enjoy!
Fall Beauty Recap
Monday, March 29, 2010
Friday, March 12, 2010
Cheap Date Friday: Rise & Shine
I have a hard time eating breakfast. Food is the last thing I want when I wake up in the morning and it takes me at least an hour to settle in to the idea of eating something small, let alone a complete breakfast. Contrary to my stomach, my face loves breakfast. Breakfast food that is, minus bacon - I put selected breakfast foods on my face to stop it from looking like I've slapped bacon all over it.
Eggs and Oatmeal are amazing for your skin and serve many purposes. In the past I've given you all a couple recipes for egg white facials and I hope you've had a chance to try them, especially you combination/oily skinned gals - works wonders for your pores! This post will focus on all of the ways to ensure your pretty little face benefits from oatmeal.
Oats are very calming and moisturizing to the skin. Aveeno fans will notice that a lot of their products contain oatmeal to soothe sensitive skin or quench dry skin, but all skin types can benefit. I have tried two ways using oatmeal: as a mask and as an exfoliant. Since I am already slave to Dermalogica's Daily Microfoliant, I use it as a mask much more often, but for those of you looking to pinch a pretty penny, using oatmeal as an exfoliant is super cheap, super effective, and super easy. SUPER!
All you need for both is some good old Quaker Oats and a grinder [a magic bullet works well in this situation]
Oatmeal Mask: the base of this mask is oatmeal [duh] and water, but you can add in other ingredients to tend more to your specific skin type or concern.
First, place about a half cup of oats in a grinder and grind them until they are almost to a powder form [you'll want some bigger pieces to remain]. Next, transfer to a bowl and add little bits of water at a time, stirring until you've created a paste. I prefer mine to be on the thin side, but if you prefer to slap on the thick stuff, go easy on the water. Now you've got your mask - spread it on to your face for 15 minutes, and when you rinse off, use the bigger oatmeal pieces in the mask to slightly exfoliate as you rinse. Voila - plump, moisturized, soft and glowy skin.
Additions - adding honey to the mask is great for dry, irritated, or acne prone skin. Lemon juice is great for skin with a lot of redness or rosacea, and adding in egg whites is great for oily skinned gals looking to tighten your skin and shrink your pores. When thinking of portions, just remember that it's going on your face, not in to your stomach to give you energy for the entire day - stay on the lighter side.
Oatmeal Exfoliant: involves using oatmeal with your regular cleanser. Take about a cup of oatmeal, grind it into powder form, and place in a jar in your bathroom. Every time you wash your face, mix a little bit of the oatmeal powder with your cleanser in your hand and cleanse as usual, making sure to rinse well. Besides being cheap, this allows you to use your current cleanser which [hopefully] you like and your skin is already accustomed to. WIN.
There are more ways to use oatmeal but they involve boiling, straining, cooling...etc etc and frankly, that takes too much time. Most of you enjoy this blog because I'd take quick and easy over complicated any day.
Enjoy your weekends...
xxLM
[PS: the Magic Bullet I referred to above is the appliance advertised on TV, not the "magic bullet" I learned about in University]
Tuesday, March 9, 2010
What colour of mascara do you recommend for different colours of eyes/hair. I never know if I should buy very black, or brownish black, or blue black...or what!!!!
Totally depends on the look you want to go for! Smokey eyes and dramatic lashes need blackest black mascara, while day to day eyes can look fantastic with a brownish black or brown mascara. Looking for drama? Using a coloured mascara just on the tips of your lashes adds dimension, eggplant colours work on all eyes :)
Monday, March 8, 2010
Makeup Monday: Brows
Have been sitting in sales meetings all day at the airport hotel and am now blogging in my ice cold room. I turned up the heat before I left my room this morning and I came back to frigid temperatures, definitely not the best way to wrap up a long a** day. I always forget how emotionally exhausting sales meetings are, checking your attitude at the door and always having to be 'on', ready to answer questions from trials and reprints that all seem to blend together as the day goes on. Tomorrow will be much of the same.
Today's MM is going to be short, I'm low on patience and high on taking a nap, my feet are ice cold and my hair is gross from nervous twittering with it all day.
Contrary to the hair on my head, my eyebrows are still in fine shape and will be until I wash my makeup off tonight. Properly groomed eyebrows are a great asset to any makeup style and greatly influence the level of "put togetherness" in your look. Great brows can really define your face and accentuate your features without being the centre of attention.
Brows are definitely one of my weaker areas of knowledge for one reason: I don't touch mine. EVER. I faithfully visit my favourite eyebrow lady at a salon once every 4-5 weeks and have them threaded, shaped, and trimmed if necessary. I love love love my eyebrow lady and if you want her name don't hesitate to send me an email or a fb message, especially since most of you access my blogs via facebook [would it hurt you to follow me?]. I am very firm on my previous statement, even in between visits I never touch my brows and it gets difficult near the end of the 4 weeks, but I've been down the road of self-plucking and it's not pretty, so I haven't taken a tweezer to my brows for a good eight (8) years.
I understand that not everyone has the funds or opportunities to have their eyebrows done on a regular basis, so I've done some research for you all on tips and tricks to perfectly shaped brows for any facial structure and some tips on how to accentuate your brows with makeup [a must for everyone].
First and most importantly, you can only work with what you have. Eyebrows, unlike hair, are not extension friendly nor are they malleable to shape however you'd like, you have to understand your face shape and natural brow patten before attempting to clean up the area. Looking at pictures is also not a great idea when grooming your brows, as almost 100% of the "perfect brows" you see on celebrities have been accentuated and filled in with makeup and are shaped to their features. The steps below demonstrate how to find your brow shape depending on your features.
 A. Using a pencil/make up brush, hockey stick: hold it vertically against the bridge of your nose so it meets touches the inner corner of your eye, where the stick meets the brow is where your eyebrow should begin.
B. Tilt the stick diagonally lining up with the outer edge of your iris, that is where the highest point of your brow arch should be
C. Line the stick diagonally with the outer corner of your eye, where it meets your brow is where your brow should end.
What you want to do is mark these points using an eyeliner pencil to define the beginning, arch, and end of your brows. Brush your brows using upward and outward motions to define the natural shape - this will give you a better indication of how thick your brows are to prevent overplucking. Keep your brows as thick as possible, you never want to overpluck.
Slowly begin plucking only the hairs that fall distinctively outside your brow shape, including the stray hair above your brows. There is always a disagreement on above-the-brow plucking and I am all for it. When my brows are threaded the tops of them are also cleaned up, and if done carefully it can really enhance your brow shape. Once you have plucked all of the very evident stray hairs, rebrush your eyebrows and step back away from the mirror. Pulling back away from the mirror gives a more accurate vision of what the shape looks like; standing too close can lead to overplucking. Happy with the shape? DROP THE TWEEZERS. Need a little more? Proceed carefully.
ONLY pluck the hairs that fall outside the shape of your brows, even if you have some areas that are sparse. Sparse areas can be filled in with pencil to create a more uniform depth while still keeping the shape you've determined above.
Once you are satisfied with your freshly groomed brows, it's nice to lightly fill them in with pencil when you do your makeup. Brow pencils come in all brands and colours, but a light blonde one works for even the darkest brows. You can also use light brown eyeliner. Taking the pencil, make short, small strokes following the natural hairline, filling in areas that are thinner than others to create uniformity. Once you are done, set your eyebrows by running a clear mascara or brow gel overthem. To add even more dimension, take a shimmery eyeshadow and blend it under the arch of your brow and blend down to the outer corner of your eye. Voila - beautiful brows!
Brows are tricky, and are relatively inexpensive (<$20) to have professionally shaped. If you do decide to go the professional route [good girl], go for brow threading rather than waxing. Yes, it hurts more, but it is undoubtedly more precise and lasts for longer. WIN.
Happy plucking,
xxLM
Today's MM is going to be short, I'm low on patience and high on taking a nap, my feet are ice cold and my hair is gross from nervous twittering with it all day.
Contrary to the hair on my head, my eyebrows are still in fine shape and will be until I wash my makeup off tonight. Properly groomed eyebrows are a great asset to any makeup style and greatly influence the level of "put togetherness" in your look. Great brows can really define your face and accentuate your features without being the centre of attention.
Brows are definitely one of my weaker areas of knowledge for one reason: I don't touch mine. EVER. I faithfully visit my favourite eyebrow lady at a salon once every 4-5 weeks and have them threaded, shaped, and trimmed if necessary. I love love love my eyebrow lady and if you want her name don't hesitate to send me an email or a fb message, especially since most of you access my blogs via facebook [would it hurt you to follow me?]. I am very firm on my previous statement, even in between visits I never touch my brows and it gets difficult near the end of the 4 weeks, but I've been down the road of self-plucking and it's not pretty, so I haven't taken a tweezer to my brows for a good eight (8) years.
I understand that not everyone has the funds or opportunities to have their eyebrows done on a regular basis, so I've done some research for you all on tips and tricks to perfectly shaped brows for any facial structure and some tips on how to accentuate your brows with makeup [a must for everyone].
First and most importantly, you can only work with what you have. Eyebrows, unlike hair, are not extension friendly nor are they malleable to shape however you'd like, you have to understand your face shape and natural brow patten before attempting to clean up the area. Looking at pictures is also not a great idea when grooming your brows, as almost 100% of the "perfect brows" you see on celebrities have been accentuated and filled in with makeup and are shaped to their features. The steps below demonstrate how to find your brow shape depending on your features.

B. Tilt the stick diagonally lining up with the outer edge of your iris, that is where the highest point of your brow arch should be
C. Line the stick diagonally with the outer corner of your eye, where it meets your brow is where your brow should end.
What you want to do is mark these points using an eyeliner pencil to define the beginning, arch, and end of your brows. Brush your brows using upward and outward motions to define the natural shape - this will give you a better indication of how thick your brows are to prevent overplucking. Keep your brows as thick as possible, you never want to overpluck.
Slowly begin plucking only the hairs that fall distinctively outside your brow shape, including the stray hair above your brows. There is always a disagreement on above-the-brow plucking and I am all for it. When my brows are threaded the tops of them are also cleaned up, and if done carefully it can really enhance your brow shape. Once you have plucked all of the very evident stray hairs, rebrush your eyebrows and step back away from the mirror. Pulling back away from the mirror gives a more accurate vision of what the shape looks like; standing too close can lead to overplucking. Happy with the shape? DROP THE TWEEZERS. Need a little more? Proceed carefully.
ONLY pluck the hairs that fall outside the shape of your brows, even if you have some areas that are sparse. Sparse areas can be filled in with pencil to create a more uniform depth while still keeping the shape you've determined above.
Once you are satisfied with your freshly groomed brows, it's nice to lightly fill them in with pencil when you do your makeup. Brow pencils come in all brands and colours, but a light blonde one works for even the darkest brows. You can also use light brown eyeliner. Taking the pencil, make short, small strokes following the natural hairline, filling in areas that are thinner than others to create uniformity. Once you are done, set your eyebrows by running a clear mascara or brow gel overthem. To add even more dimension, take a shimmery eyeshadow and blend it under the arch of your brow and blend down to the outer corner of your eye. Voila - beautiful brows!
Brows are tricky, and are relatively inexpensive (<$20) to have professionally shaped. If you do decide to go the professional route [good girl], go for brow threading rather than waxing. Yes, it hurts more, but it is undoubtedly more precise and lasts for longer. WIN.
Happy plucking,
xxLM
Saturday, March 6, 2010
Little Miss Sunshine

The sad part is, little miss sunshine is a two faced b*tch who's main goal is to slowly destroy us in the dirtiest way possible - she makes us beg for it, she makes us want her so badly that we're keen to drop all of our plans just to spend a little more time with her, all the while she's silently harming us, watching us enjoy every minute of it. Not a fan of S&M? Guess what, you're in a masochistic relationship with little miss sunshine.
It shouldn't be news to you that the sun is bad for your skin and that nice tan we all love is just a way of announcing to the world that you have sun damage. If tanning was a crime I'd be on the death chair from my years of not only oiling up my body and laying outside for hours, but oiling up my body and hopping into a tanning bed for ten minutes multiple times a week during the winter months [okay fine, during the summer months too, don't act like you don't know what I'm talking about]. My obsession with skincare has led me to stop tanning and I am slowly learning to love my natural, very fair, cool-toned complexion. I've made a pact with myself to avoid tanning from now on, especially on my face which will be enjoying SPF 85 from May-September every year. *not to disappoint my collection of tan-necessary gold jewelry, I will also be enjoying self tanning and makeup three shades darker than my actual skin tone... one of the few time's I look forward to faking it.
I've known that the sun was bad for me for years, but it wasn't until I realized that all the time and money I spend to have good skin is completely shot to sh*t every time I let my skin be subjected to the sun's rays. I'm sure there are a lot of you out there like me, you want great skin but you not only love the sun, you love the way your skin looks with a tan. It's a tough spot to be in, but here are the facts beyond "the sun is bad for you" that may have you joining me in racking up some Shoppers Optimum points from the sunscreen aisle this summer.
The fact that the sun can cause skin cancer doesn't seem to resonate in today's generation as demonstrated by packed beaches and pre-spring break line ups at the tanning salon [it's always a good idea to pre-damage your skin before damaging it even more in Cancun or wherever you're going to lose your dignity this March]. Since I live by the "true beauty is on the outside" motto, the more common and visible results of sun damage put my panties in a knot more than skin cancer did, and here's what I know.
Over 80% of the signs of skin aging in adults results from their tans as teens.
A lot of people think that a sunburn is the visible sign of sun damage, but even a light tan is a sign that you've damaged the top layer of your skin. Take a look at the skin on the underside of your arm and compare it to the skin on the top - the skin on the underside of your arm is how your entire body should look, it is generally undamaged from the sun. The differences you see in the skin on the top of your arm [different colour, freckles, hyperpigmentation] is all sun damage accumulated over the years. FAIL.
Every time you tan, you are inviting the suns UV rays to break down collagen [primary structural protein in your skin] and increase elastin [protein that allows tissues to stretch]. In english, less firmy + more stretchy = saggy [or FAIL]. When this happens, enzymes in the body attempt to rebuild the collagen. Simple solution? Not quite, as this process doesn't work the way it should and the enzymes end up breaking down more collagen, creating the entire sequence again and causing solar scars [in facebook terms, Collagen is in a complicated relationship with Metalloproteinases (the enzyme)]. What happens as this process is repeated over and over again? Wrinkles.
Your beautiful face isn't the only recipient of these wonderful wrinkles; UV rays also cause thickening of the skin especially in the neck area, resulting in deep, coarse wrinkles. The best thing about these wrinkles? They're permanent. While on the topic of permanent, the sun also causes permanent stretching of tiny blood vessels that give your face an all over reddish appearance.
Melanin is a brown pigment that is designed to shield your body from UV rays. UV rays damage melanin causing it to grow, so that pretty little tan you love is actually the melanin in your body struggling to protect you from little miss sunshine. Continuous sun exposure damages these cells to the point where freckles or "age spots" develop, especially on the face, shoulders, arms, chest, and back of the hands. What many people don't realize is these "age spots" aren't due to chronological aging at all, they result from your relationship with the sun, sort of like your own little STD.
Re-thinking your relationship with little miss sunshine?
I hope so. Next Saturday I'm going to post a break-up guide for those of you who have decided to take your first steps towards a healthy relationship with that new guy, SPF. It's always uncomfortable to run into an ex, but by next week you'll be confident and prepared to handle anything your ex decides to throw at you, because believe me, little miss sunshine does NOT like to be pissed off, and she 'ain't going nowhere.
xxLM
Monday, March 1, 2010
Makeup Monday: Dual Personality.
How is it already March?
How is it already March and I have yet to find the perfect leather booties, or finish the last Twilight... or take a vacation day? [the answer to the last one I know, and am still frumpled about - did you know I had the option to hit up the Bahamas this past week?]
 It's makeup Monday - yay! I think one of the things that seems to resonate in a positive way with the peeps who read this blog is the fact that I try to be as realistic as I can. I understand that not many people share my enthusiasm for finding the perfect lipliner, the best deep conditioner, or the amazing Orgasm blush that imparts the most perfect glow. I also understand that not many of you will own seven bronzers, ten mascaras, or thirteen blushes [not that I own that many...] - so today's MM will revolve around the products in your makeup bag that have two or three different uses, so you can maximize your look without struggling to zip up your makeup bag.
Your concealer can double as...
an eyeshadow primer or even an eyeshadow. Priming the lids of your eyes not only helps your shadow last longer, but it makes application smoother and creasing a thing of the past. After you pat on your concealer, use your ring finger to pat concealer all over your lid and on to your brow bone to eliminate any lid discoloration or oiliness. Like the way that looks? Then leave it! I love a neutral eye and at least three days a week I skip shadow and just tightline and add mascara to my primed eye and it's the perfect daytime look.
Your eyeshadow can double as...
a contour color. I am a firm believer that every girl should own a neutral, matte brown shadow - it matches any eye colour, and is great as a crease colour or a base for a smokey eye. It's also great for your cheeks! I wrote a while back about how to contour your cheekbones to slim your face using bronzer, which is great; however, not everyone owns bronzer, and if you have small features or a tiny face [head? how do I say that?] using bronzer may be overload - and that's where the shadow comes in. After you apply your blush, take your brown shadow on an eyeshadow brush and lightly tap the brush under your cheekbone, following the bone structure up to your ear. Blend well, and voila - contour!
Your lipstick can double as...
blush! Cream blush that is. Strapped for time? Looking for a quick pick me up and don't have a blush brush with you? Dab a small amount of lipstick on the apples of your cheeks and using your middle and ring finger gently buff [circle] the colour into your skin, moving upwards towards your ears. Hold on, to clarify - I'm talking about lipsticks in the pink range, and I'm talking about lipstick - not lip gloss or lip balm - ew.
Your blush can double as...
brow highlight. Adding a lighter colour to your brow bone instantly perks up your face and brings life to your eyes. Don't own a highlight? After you put on your blush, sweep the brush on to your brow bones with whatever product is left on the brush - it will impart a subtle colour that will add some sparkle to your eyes.
Your eyeliner can double as...
brow filler. Another firm belief? Every girl should own a light brown eyeliner. We all know eyeliner enhances the eyes, but this liner can also be used to fill in your brows. I love eyebrows and really believe that great brows can make an entire look. What you can do is take your liner, sharpen it, and using small strokes gently follow the hairs in your brows, filling in any sparse areas.
Your mascara can double as...
foundation. haha just kidding. In the MM post a while back, I admitted my love for all things lashes. In that, I mentioned the technique of using your mascara to double as eyeliner. This is a great tip and I do this almost daily, it makes the base of your lashes look thicker without worrying about messy liner. What you do, is after coating your lashes a couple times [starting at the tip, we all love a game of just the tip] take the brush and place it right at the base of your lashes and twist outwards. This will cause your eyelid to raise up slightly and the brush will touch your inner waterline. Wiggle the brush a couple times while its touching the waterline - the mascara will be perfectly tightlined with your lashes creating drama, volume, and thickness. WIN.
Your bronzer can double as...
a cleavage booster. I've only done this once, and if you know me you know I prefer things to be a little smaller in this area [note: that comment refers only to the chest]. However, I know a couple ladies mom that would love some extra boost for those deep white lace V necks we all wear to work, so here's a tip. Take bronzer on a big powder brush and apply it to your chest in a V formation, with the bottom of the V being both horizontally and vertically in the middle of your boobs. The colour should sweep up and out over each side. BLEND. Using a darker colour in the middle of your chest like this makes the illusion of a deeper hollow, which would normally be created by bigger ta-tas. Need a visual? I learned this tip from my all time favourite MUA, Melissa - click here to watch.
There are lots of makeup items with dual personalities but those are a few of my favourites that I use on a weekly basis at least. Some days I envy you girls that have a half empty make up bag [probably an old Clinique Bonus Time one] that you can throw in a suitcase or in your purse and have everything with you; then I think of having to give away my seven bronzers, ten mascaras, and thirteen blushes [along with all my other colourful possessions] and I get rashes all over my perfectly V'd Anjelina Jolie chest. FAIL.
Have a lovely week blogettes,
xxLM
How is it already March and I have yet to find the perfect leather booties, or finish the last Twilight... or take a vacation day? [the answer to the last one I know, and am still frumpled about - did you know I had the option to hit up the Bahamas this past week?]

Your concealer can double as...
an eyeshadow primer or even an eyeshadow. Priming the lids of your eyes not only helps your shadow last longer, but it makes application smoother and creasing a thing of the past. After you pat on your concealer, use your ring finger to pat concealer all over your lid and on to your brow bone to eliminate any lid discoloration or oiliness. Like the way that looks? Then leave it! I love a neutral eye and at least three days a week I skip shadow and just tightline and add mascara to my primed eye and it's the perfect daytime look.
Your eyeshadow can double as...
a contour color. I am a firm believer that every girl should own a neutral, matte brown shadow - it matches any eye colour, and is great as a crease colour or a base for a smokey eye. It's also great for your cheeks! I wrote a while back about how to contour your cheekbones to slim your face using bronzer, which is great; however, not everyone owns bronzer, and if you have small features or a tiny face [head? how do I say that?] using bronzer may be overload - and that's where the shadow comes in. After you apply your blush, take your brown shadow on an eyeshadow brush and lightly tap the brush under your cheekbone, following the bone structure up to your ear. Blend well, and voila - contour!
Your lipstick can double as...
blush! Cream blush that is. Strapped for time? Looking for a quick pick me up and don't have a blush brush with you? Dab a small amount of lipstick on the apples of your cheeks and using your middle and ring finger gently buff [circle] the colour into your skin, moving upwards towards your ears. Hold on, to clarify - I'm talking about lipsticks in the pink range, and I'm talking about lipstick - not lip gloss or lip balm - ew.
Your blush can double as...
brow highlight. Adding a lighter colour to your brow bone instantly perks up your face and brings life to your eyes. Don't own a highlight? After you put on your blush, sweep the brush on to your brow bones with whatever product is left on the brush - it will impart a subtle colour that will add some sparkle to your eyes.
Your eyeliner can double as...
brow filler. Another firm belief? Every girl should own a light brown eyeliner. We all know eyeliner enhances the eyes, but this liner can also be used to fill in your brows. I love eyebrows and really believe that great brows can make an entire look. What you can do is take your liner, sharpen it, and using small strokes gently follow the hairs in your brows, filling in any sparse areas.
Your mascara can double as...
foundation. haha just kidding. In the MM post a while back, I admitted my love for all things lashes. In that, I mentioned the technique of using your mascara to double as eyeliner. This is a great tip and I do this almost daily, it makes the base of your lashes look thicker without worrying about messy liner. What you do, is after coating your lashes a couple times [starting at the tip, we all love a game of just the tip] take the brush and place it right at the base of your lashes and twist outwards. This will cause your eyelid to raise up slightly and the brush will touch your inner waterline. Wiggle the brush a couple times while its touching the waterline - the mascara will be perfectly tightlined with your lashes creating drama, volume, and thickness. WIN.
Your bronzer can double as...
a cleavage booster. I've only done this once, and if you know me you know I prefer things to be a little smaller in this area [note: that comment refers only to the chest]. However, I know a couple ladies mom that would love some extra boost for those deep white lace V necks we all wear to work, so here's a tip. Take bronzer on a big powder brush and apply it to your chest in a V formation, with the bottom of the V being both horizontally and vertically in the middle of your boobs. The colour should sweep up and out over each side. BLEND. Using a darker colour in the middle of your chest like this makes the illusion of a deeper hollow, which would normally be created by bigger ta-tas. Need a visual? I learned this tip from my all time favourite MUA, Melissa - click here to watch.
There are lots of makeup items with dual personalities but those are a few of my favourites that I use on a weekly basis at least. Some days I envy you girls that have a half empty make up bag [probably an old Clinique Bonus Time one] that you can throw in a suitcase or in your purse and have everything with you; then I think of having to give away my seven bronzers, ten mascaras, and thirteen blushes [along with all my other colourful possessions] and I get rashes all over my perfectly V'd Anjelina Jolie chest. FAIL.
Have a lovely week blogettes,
xxLM
Friday, February 26, 2010
Cheap Date Friday: The Kitchen Hair Mask

TGIF blogettes, TGIF.
What are you doing this weekend? Me? I'll be spending time in Target. Jealous?
A couple weeks ago I gave you recipes for at home face masks, did you try them? The egg white one is the best, tightens your pores and takes out redness, especially mixed with a couple drops of lemon juice.
If I had to choose between a face mask or a hair mask, I'd definitely pick hair. Hair masks are good no matter what type of hair you have and can drastically change the condition of your strands. If you suffer from a lot of static hair in the winter, you should deep condition or do a hair mask at least once a week, especially to prevent the cold winds from damaging the hair cuticles.
Hair masks can be expensive especially if you don't do them regularly, so here are a couple recipes for quick, at home hair treatments that will leave you soft and shiny in 20 minutes :)
Avocado & Olive Oil - Mash up a ripe avocado, add 1 tablespoon of honey and 2 tablespoons of olive oil. Mix until it becomes a creamy texture, apply to your hair and let it sit for 20 minutes. Rinse out with shampoo.
Banana and Almond (great for dry, damaged hair) - mash up a ripe banana and add in a couple drops of almond oil (you can get at healthfood stores). Apply for 30 minutes and rinse out with shampoo.
Egg Yolk & Milk - sounds sick, but is really nourishing. Beat only the yolk of an egg until it is frothy and add one cup of milk. Run it through your hair concentrating on the ends and leave in for about 15 minutes, rinse well.
Coconut Oil - I mentioned this as my obsession on Wednesdays mash up post, and this puppy has transformed my hair in a week. Coconut oil is apparently one of the few oils that can penetrate deep into the hair cuticle unlike some others that just sit on top, and if you had a choice, I'm sure you'd choose something that would penetrate rather than just sit on top [did that go too far?]. Coconut oil is sold at healthfood stores and is in solid form, but melts very easily. I take a big chunk and warm it in my hands until it is completely melted into the oil, run through my hair and practice my french braiding skills. Sleep with it in overnight (its not greasy at all) and shampoo as usual in the morning and I swear, soft, shiny hair that looks so healthy - I love it.
For Blondes... Take a pint of water and add in a couple drops of lemon juice. After you shampoo, rinse with this solution - the lemon will take out any brassy tones that have settled in to your hair over time, leaving your blonde bright and shiny!
I can't remember the last time my hair was my natural colour so you can rest assured that all of these are safe for colour treated hair. I've tried them all, even the lemon juice one when I was blonde last year and they all work; however, if I had to pick a favourite, it'd be coconut oil. As you read Wednesday, it's also great as an eye makeup remover, body lotion (keep a small bowl of it in the shower and let it melt with the steam, once you've turned the water off rub in onto wet skin and pat dry - glowy, soft skin all day), and has actually turned out to be great on any rashes or skin irritations - WIN.
Since I'll be at Target this weekend there will be no skincare saturday, but I promise I'll write it Sunday night... better late than never right?
xxLM
*photo courtesy of InStyle.com
Monday, February 22, 2010
Makeup Monday: The Touch Up

Did you have a nice weekend? Do you have a busy week coming up with lots of night committments?
If you do, then this post is for you.
When I do my makeup I use specific products to make it last all day, and for the most part, my makeup does make it till the end of the day. There is often a misunderstanding between lasting all day, and looking fresh all day. When I go from work to play I like my makeup to look like I've just applied it, even though that will never be the case. I never do a complete re-do of my makeup because I don't like to wash my face mid-day, it's not the best for my skin, nor is it the best for yours. So, here is what I always have on hand to freshen up my makeup between work and dinner/drinks/insert your plans here.
Boscia blotting papers - Since I have combo skin, my T zone can get too shiny so I blot regularly during the day. There is a distinct difference between a 'glow' and an oil slick for us combination skinned gals so these are critical to have on hand. I prefer these Boscia ones to the thicker, rubber-y kind. These are delicate, thin pieces of rice paper that absorb more oil without overdrying my skin, or disrupting my foundation.
Benefit Eye Bright - I love this thing - its a thick, fleshy pink coloured [haha] pencil that I use to brighten my eyes. It's amazing how a little hint of lightener in the inner corner of your eyes can really brighten up your face. I use this not only on my inner corners, but on my brow bone, the outer corner of my eyes, and around my nose. Blend nicely - and suddenly you're awake! You can also use a liquid brightening pen which will give an even better payoff than one in stick form. The most popular one in the world? YSL Touche Eclat. This thing is awesome and I am currently looking for a dupe that will last a little longer, if not, repurchase for sure.
Mascara - any kind will do, I usually use the travel size ones you find in giveaways or Clinique Bonus Time bags. I take mascara and wiggle it only at the base of my lashes so it hits my top lashline, creating the illusion of thicker lashes, and I also add a little mascara to the tips of my outer lashes to freshen up my eye makeup.
Lipstick - this one may not be for everyone, but I have a baby-pink lipstick (Mac Hue) that I use not only on my lips, but on my cheeks as well. Blush is always a great pick me up, but if I'm not at home I will dot this puppy on my cheekbones and blend with my fingers - subtle colour but really brightens up my skin. Any pink lipstick will do! Of course adding lipstick to your lips instantly refreshes your face as well - especially if you use NARS Easy Lover layered on top of your favourite Chapstick - YUM.
Mac Fix+ - I.Love.This.Stuff. I don't know how I ever lived without it. Fix+ is a solution that is usually used to set makeup (after you apply your powder), but I use it throughout the day to add radiance and refresh my skin, especially in the winter. If you use powder foundation and find your skin looking a little chalky or cake face-y, one spray of this and it disappears. After work, I'll blot with the Boscia papers and use the rest of the items above, once I'm finished, I'll spray my face with this. Instantly my face is brighter and my skin is softer, and the smell is amazing too!
I've got nightly commitments every night this week so you can bet your a*s I'll be doing this daily. If you happen to be one of the people I'll be seeing at night this week, you should probably compliment me - it makes me feel good. Shallow? You bet.
Enjoy your touching [up]
xxLM
Saturday, February 20, 2010
Skincare Saturday: Ac-no
You've watched my video and you've heard numerous times that I don't have flawless skin. Yes, my skin now behaves much better than it used to, but that took a lot of time, effort, and patience. For some, acne is seen as something you just "grow out of", but it didn't seem that way for me - and I'm sure it doesn't seem that way for some of you.
Below are the products I used and the exact routine that got my skin to where it is now - relatively clear with the occasional breakout, for which I use one of the cheap methods I told you about yesterday.
The Products
 Cetaphil - I could rave about this forever and I will never use another cleanser. Cetaphil Gentle Skin Cleanser (not the one for oily skin) is soap free, fragrance free, PH balanced and extremely gentle for even the very sensitive skins. It doesn't strip your face leaving it dry, nor does it leave any greasy residue. Love.
Pond's Cold Cream - I learned about cold cream through research and used it only at night, before washing my face with Cetaphil. I was amazed at how much softer and cleaner my skin was when I was using this - and rightly so. Even with a cleanser and toner, there can still be trace makeup deep in your pores, especially if you have acne prone skin where your pores are large.
Dickinson's Witch Hazel Toner - toner is a step that a lot of people tend to skip, and I'm not really 100% sure if it's necessary or not. For me, it was. There are a lot of toners out there, a lot with fancy labels and false promises - but the one I still use and will continue to use is Dickinson's Witch Hazel. You can get it at CVS or Meijer's, and if you are a Canadian gal, any health food store will have a version of witch hazel. This toner really cleans out your pores, removing any leftover traces of makeup and prepping your skin for moisturizer. It never left me dry [which in any situation, is a good thing] and it helped with oil production a ton.
Philosophy Turbo C Booster Power - Vitamin C is amazing for the skin - it's one of the most effective agents to even skin tone and brighten the complexion. Since I was really picky with my skin, it was hard to find a Vitamin C moisturizer that wasn't too heavy and wouldn't irritate my skin. Solution? This Vitamin C is in powder form, and you mix it with your serum or moisturizer. Using this really helped with old scars, oil production, evening my skin tone, and it drastically brightened my skin.
Vichy Normaderm Anti-Imperfection Hydrating Care - this.saved.my.life. I've gone through at least four of these over the past three years and will always have it on hand. Unlike your generic, dry-your-skin-out moisturizers designed for acne, this Vichy product is designed for reoccurring blemishes due to hormones, stress, or the environment. It's very light and is the perfect balance of moisture and oil control, all the while cleaning my pores and treating my acne. WIN.
Philosophy Microdelivery Exfoliating Wash - is simply amazing. My mom and I both use it and really like it. After my Dermalogica Daily Microfoliant is gone [amazing also], I'm going to repurchase this. The exfoliating beads in this are gentle enough for sensitive skin and it left me with a more even skin tone and a definite glow-y effect.
Queen Helene Mint Julep Mask - I don't think I can say more about this mask since I've probably raved about it in every SS. Super cheap, super refreshing, and effective. WIN.
So those are the products I used religiously for a good two years, and after a couple months my skin drastically changed, along with my confidence.
Here is the routine I followed:
Morning - Cetaphil + Witch Hazel Toner + Turbo C Powder mixed with Vichy moisturizer
Night - Cold cream + Cetaphil + Witch Hazel Toner + Vichy Moisturizer
Every other night I would substitute the Microdelivery Wash for the Cetaphil. On the nights I exfoliated I used the Mint Julep mask right after, followed by toner and moisturizer. Along with a consistent routine, I started drinking more water and making a concentrated effort to stop touching my face, and I do believe that this also helped a lot.
I'm not saying that these products will definitely work for you, but a consistent routine is critical. If you find products you love, stick with them. Changing products every couple weeks is harsh on your skin, especially because it takes a couple weeks for your skin to adjust to your current products. Don't expect to see results from your new skincare in a couple days, it will take at least three weeks to start seeing minor improvements.
I feel that this post has been somewhat of a downer with no quirky comments or sexual references, but for me, acne was a serious cloud in my life for a long time and I am so, so, so glad I forced my skin to "grow out of it"
I hope this helps some of you gals who feel the same as I felt. :)
xxLM
Friday, February 19, 2010
Make a Splash!
Oh em gee two posts this Friday?
You got it.
I didn't realize my lack of fashion posts until now - I'm sorry I've been slacking.
So, to get back on track, I thought I'd help you out with what is absolutely the worst shopping trip for almost any of us : bathing suit shopping.
Yes ladies, it's time. Spring break is approaching, summer vacations are approaching, an increase in your waxing allowance should definitely be approaching as well. Still shave? You've got no idea how much better it can be.
So to save you time, here is a list of my favourite bathing suits for Summer 2010, and I've also included a little part about where I would wear each one [because we all know bathing suits are what brings all the boys to the yard, not your milkshake.]
 The best way to get noticed at the beach is to pick a bathing suit that is at least two sizes too small for you. My philosophy? The smaller the triangles the better. You also want the bottoms to hit at most one full hand length below your belly button. Have big hands? Score!
Posing at the beach is also a definite must and I've got to say, this classic half arch twist is a surefire way to bring the boys over. See how her right shoulder is slightly back? It's saying "I want you, but I'm pulling away" - and we all know boys love to play games like this. So much so, that they'll bring their friends straight over to you and ask you to toss around a football with them, and you're in luck, because a bikini like this is perfect for heavy, full contact sports in the sand.
 Almost all of the products in my bathroom are designed to either make me look younger, or make me stay looking younger for longer. All of us would love to take a couple years off, and the best way to do this is to pick a bathing suit that would look great on your 10 year old. Baby pinks, polka dots, and ruffles ruffles ruffles will make sure you get ID'd at the beachfront bar.
The mathematical equation when trying to look younger in swimsuit season is the older you are, the younger you go with your swimsuit. Over 50? I'd shop in the kids section if you can, or at least go for a bikini with lots of ducks on it. As for the posing, you want to pose softly here, looking oh so innocent and oh so naive. Who knows? Maybe your next Shirley Temple will be courtesy of the pool boy.
 Every year I get nervous for work functions that require a bathing suit. You know, you get invited to the company pool-party, or you're away at a meeting and they take you to the hot springs- it's uncomfortable! What you want to do in this situation is look as confident as you do everyday in the office and there is no better way to do this than animal print. When it comes to animal print, there's no better way to wear it than to pick a suit that looks like you've recently been attacked by the animal.
You want miminal material here ladies, and the neck on this suit looks so comfortable. With this suit you're guaranteed to get your boss' attention and it may be the best time to bring up that promotion you've applied for. You'll also want to sit like this as much as possible, and if it's not windy, I know where you can get a great fan.
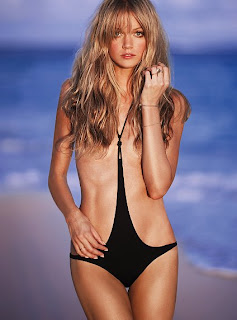
 These days it seems as if the latest trends change faster than I can eat a Twizzlers Pull n Peel, but one thing never changes: tanlines will never be in style. Every summer I try to avoid tanlines as much as possible, and this summer will be easier than ever! I've picked this suit as my go to suit for tanning. I've purchased the other suits above for various social functions, but this is specifically reserved for those days where bronzing up is my main goal. I can't wait to slather coconut oil all over my body and strap myself into this baby for a long day of magazines and mojitos.
Note: With a suit like this, the only way you'll get tanlines is if you're laying down, so it's best to stay standing the entire day. See how her shoulders are subtly pulled back? It's to ensure her sides also bask in the glory of UVA and UVB rays, smart cookie.
 Let's recap - you've got a suit to bring the boys to the yard, a suit to make you look younger, an office-party appropriate suit and your go to tanning suit: think you're done? Wrong.
You're missing the most important suit of all - the suit you'll wear to all family functions, especially the one's in which you'll meet your new boyfriend's parents for the first time. Every boy wants to bring a confident, self-assured girl home to meet mom and this baby is a surefire way to show confidence.
With this suit, you'll not only portray yourself as a smart, classy, dignified woman, you'll be able to let your true self shine through without worrying about uncomfortable straps or the dredded wedgie. This suit is great for summer barbecue's and roasting s'mores because it's almost impossible to spill on, and is perfect for that impromptu cannon ball challenge.
Best of all? This suit is the perfect excuse to dodge that haircut you've been avoiding. You could also whip out your new hair extensions, because nothing says summer sexy than 50 clips of human hair sweating on your scalp in the 100 degree weather!
I've got a work meeting coming up in about a month and I'm so relieved I've got my bathing suit ready to pack; furthermore, I've got a family vacation in May with my parents and a couple of their friends, so I really want to make a good first impression and make my father proud.
I hope this has eased some of your bathing suit blues and gotten you excited for the sun to come out! I have a feeling this will be your best bathing suit season yet, so get shopping! All of these suits are available to order from Victorias Secret at reasonable prices, and the best way to ensure you get the right size is to guesstimate, or take the size you'd like to be and go one smaller. You always want your bathing suit to be on the small side.
Still hesitant? Just remember: if you want to feel good about yourself and get some positive attention this summer, you've got to remind yourself that true beauty is on the outside, and everyone will be looking at your outsides when you rock one of these.
Happy shopping!
xxLM
*all photo's courtesy of VictoriasSecret.com
You got it.
I didn't realize my lack of fashion posts until now - I'm sorry I've been slacking.
So, to get back on track, I thought I'd help you out with what is absolutely the worst shopping trip for almost any of us : bathing suit shopping.
Yes ladies, it's time. Spring break is approaching, summer vacations are approaching, an increase in your waxing allowance should definitely be approaching as well. Still shave? You've got no idea how much better it can be.
So to save you time, here is a list of my favourite bathing suits for Summer 2010, and I've also included a little part about where I would wear each one [because we all know bathing suits are what brings all the boys to the yard, not your milkshake.]

Posing at the beach is also a definite must and I've got to say, this classic half arch twist is a surefire way to bring the boys over. See how her right shoulder is slightly back? It's saying "I want you, but I'm pulling away" - and we all know boys love to play games like this. So much so, that they'll bring their friends straight over to you and ask you to toss around a football with them, and you're in luck, because a bikini like this is perfect for heavy, full contact sports in the sand.

The mathematical equation when trying to look younger in swimsuit season is the older you are, the younger you go with your swimsuit. Over 50? I'd shop in the kids section if you can, or at least go for a bikini with lots of ducks on it. As for the posing, you want to pose softly here, looking oh so innocent and oh so naive. Who knows? Maybe your next Shirley Temple will be courtesy of the pool boy.

You want miminal material here ladies, and the neck on this suit looks so comfortable. With this suit you're guaranteed to get your boss' attention and it may be the best time to bring up that promotion you've applied for. You'll also want to sit like this as much as possible, and if it's not windy, I know where you can get a great fan.

Note: With a suit like this, the only way you'll get tanlines is if you're laying down, so it's best to stay standing the entire day. See how her shoulders are subtly pulled back? It's to ensure her sides also bask in the glory of UVA and UVB rays, smart cookie.

You're missing the most important suit of all - the suit you'll wear to all family functions, especially the one's in which you'll meet your new boyfriend's parents for the first time. Every boy wants to bring a confident, self-assured girl home to meet mom and this baby is a surefire way to show confidence.
With this suit, you'll not only portray yourself as a smart, classy, dignified woman, you'll be able to let your true self shine through without worrying about uncomfortable straps or the dredded wedgie. This suit is great for summer barbecue's and roasting s'mores because it's almost impossible to spill on, and is perfect for that impromptu cannon ball challenge.
Best of all? This suit is the perfect excuse to dodge that haircut you've been avoiding. You could also whip out your new hair extensions, because nothing says summer sexy than 50 clips of human hair sweating on your scalp in the 100 degree weather!
I've got a work meeting coming up in about a month and I'm so relieved I've got my bathing suit ready to pack; furthermore, I've got a family vacation in May with my parents and a couple of their friends, so I really want to make a good first impression and make my father proud.
I hope this has eased some of your bathing suit blues and gotten you excited for the sun to come out! I have a feeling this will be your best bathing suit season yet, so get shopping! All of these suits are available to order from Victorias Secret at reasonable prices, and the best way to ensure you get the right size is to guesstimate, or take the size you'd like to be and go one smaller. You always want your bathing suit to be on the small side.
Still hesitant? Just remember: if you want to feel good about yourself and get some positive attention this summer, you've got to remind yourself that true beauty is on the outside, and everyone will be looking at your outsides when you rock one of these.
Happy shopping!
xxLM
*all photo's courtesy of VictoriasSecret.com
Cheap Date Friday: Acne Academy
You know the feeling - you're two days away from that cocktail party, your hand swipes across your face to fix your lipstick and you feel it. You feel the deep, hard bump [whoa, pace yourself] that you know in two days will result in a pretty pimple on your pretty face.
F*ck.
I've struggled with acne all my life and still do. Stress, food, environment: you name it, it affects my skin and not in a good way. I've spent millions of dollars on lotions, potions, and everything in between and will never purchase any of that anymore thanks to these kitchen-cures that work just as well, just as fast, and are just as cheap as that girl who winked at your boyfriend last Friday night at the bar. I mean what was she thinking? Who does she think she is? It's obvious he's with you, was him holding your hand not a clear enough sign? Girls.
Girls p*ss me off sometimes, especially with relationship dramz. omg lol lmfao ttyl brb... FML.
My apologies for the quick b*tchfest, back on track now. Here are some kitchen cures for those unwelcome guests.
Toothpaste - toothpaste is great to put on any blemishes that are in the "red bump" stage or further along. The toothpaste dries out the pimple and reduces redness and inflammation, probably preventing skin cavities and skin gingivitis along the way too. The catch: it has to be white toothpase, the cheapest kind, not the fancy gel ones. And, you put it on with your finger, not a toothbrush. And, you should probably do this at night, FYI.
Tea Tree Oil - tea tree oil is usually found at healthfood stores and is amazing for your skin, and just so happens to be amazing for acne at the premature stage: where you can just FEEL it coming. At night, soak a Qtip in tea tree oil and hold it directly on the forthcoming blemish for a couple minutes, not seconds, minutes. The oil will remove the bacteria from your skin without overdrying.
Ice Cubes - I understand that not everyone carries ice cubes around with them, but here's the sitch - every book you'll read will tell you never to pick your face, and they're right. Picking creates scars, indentations, and your dirty fingers jamming in to the area around a pimple aint the best idea either. HOWEVER, if I see a whitehead, you can bet your a*ss I'm going to get rid of it - right then. So, what you can do is take an ice cube and press it into the pimple for a couple seconds. The cold will make your vessels constrict and it will take away the redness, then gently take two Qtips (not your fingers) and press down on the outer edges of the pimple. Obviously it will pop, and you can use one Qtip to clean off the blemish, while you roll the other one over the area to make sure it is completely cleaned out. Top with a little tea tree oil and no more whitehead, and no scars tomorrow.
Aspirin - when I had really bad acne I decided to try the Aspirin mask and it definitely works. This is geared more towards an area where there are several red blemishes, not one single little guy. Aspirin is an inflammatory agent and works as a topical to heal redness and swelling on your face. Catch: it has to be non-coated Aspirin (not tylenol, advil, or the mydol you're taking while enjoying your new face friends). I found the best way to use the Aspirin mask is to take a spoon and crush 7 or 8 pills into a bowl, add a touch of water and a touch of honey to create a nice texture and slap that puppy on to your face for a good 15 minutes ... fantastique
These are the methods that are currently working for me, but acne is different for everyone for sure. The best cure for acne is a good skincare regime that doesn't overdry your skin which actually causes more oil to be produced, therefore more acne. Cleanse, tone, moisturize and exfoliate 2-3 times a week. Lots of water and lots of keeping your hands in your pockets and not on your face will help too :)
Skincare Saturday is tomorrow - maybe I'll write about the skincare I used when my face was at it's worst? Yum.
xxLM
Monday, February 15, 2010
Makeup Monday: Lashes.
I'm too impatient to think up a clever intro and I want to get right to the point:
I love lashes. I'd date lashes if I could.
 Lashes are my favourite because they add the allure to all eyes. The smokey eye would be nothing without lashes. The cat eye would be nothing without lashes. What the F would Twiggy be without lashes?
Nothing.
So, over the years I've experimented and can finally say I've found some great tips that have not only worked on my lashes, but on all the lashes of my beautiful friends that ask me to do their makeup. The best part about lashes is you don't necessarily have to have the best of the best mascara, some of the most popular mascara's in the world are ones you'll find at the drugstore.
One.
Be kind to your lashes - this is probably the most important step. Wash your mascara off every night with a gentle eye makeup remover and avoid picking at clumps. Vaseline is a great eye makeup remover and also works as a lash conditioner
Two.
Curl your lashes. My mom doesn't use an eyelash curler and it's definitely affecting our relationship. I've explained time and time again that curling her lashes will open up her eyes, making her look more awake and giving her the ability to give a solid wink to selected Doctor's that she works with. You can get eyelash curlers anywhere; however, the best of the best and most popular curler in the world is by Shu Uemura, it's around $25 and available at Sephora.
 To curl your lashes: looking forward (not up) place the curler at the base of your lashes. Gently pulse the curler twice at the base of your lashes, holding each one for about 2-3 seconds. Then, gently pulsing at different points, walk the curler down the length of your lashes until you reach the tips. Extra: If you tilt the curler up (handles towards the mirror) as you walk the curler down your lashes you'll get an extra opening effect. Extra extra: a lot of lashes have a hard time holding a curl (especially if your lashes naturally point down), what you can do is using a clean lash wand (you can swipe get these from Sephora at the tester counter places) and put a tiny bit of hair gel on the wand. After you curl your lashes, run the hair gel over them, let dry, and then apply mascara. Voila! Perfectly erect lashes ;)
Two point five.
This is set as a 2.5 because using a lash primer may not be a big thing for some people. Lash primers are applied before mascara and can help give your lashes some extra volume or length. I use a lash primer everyday, but only at the tips of my lashes. I used to use the primer all up my lashes, and then discovered it works better if I play a little game of just the tip. Your lashes are thinner at the tip, so putting primer only there creates a longer, more uniform lash that really stands out. If you are going to use a primer, make sure your mascara completely covers the primer, there are a lot of girls out there with black lashes decorated with random pieces of white primer, and nobody likes a speckled tip.
Three.
Apply mascara to the tips first. Just like primer, applying your mascara to the tips of your lashes first will even out the thickness, allowing your lashes to appear longer and your curl to hold better. The way you apply mascara is crucial if you love lashes as much as I do.
 Double up. I use two types of mascara every day - a thickening and a lengthening. Following the application steps above, using the lengthening mascara first. Follow steps one and two, and instead of doing multiple full swipes with the lengthening, switch to the volumizing and get a couple good swipes in there too. All makeup books and lessons will tell you to wait until each coat dries before applying another one, but this is BS. Who has time to wait in between swipes? If you do, who wants to put mascara on dry-mascara'd eyes? It works better if you layer while the mascara is still semi-wet, just make sure to run your comb through at the end to get rid of any clumps
 Last but not least - I've had a lot of questions about lash enhancers - Latisse, Revitalash, etc. These are treatments designed to be applied to the lashline at night, aimed at growing your natural lashes. The only product I have experience with is RevitaLash and I used it for a good three months. I did notice a big difference using it, and it's effects seem to have kept somewhat intact. The downside to these - they are expensive and are somewhat irritating to your eyes, along with Latisse being only available by prescription. However, L'Oreal has now come out with a drugstore alternative, Lash Boosting Serum and I did purchase this. I haven't started using it yet, but will review once I have used it for a good 4 weeks.
I love lashes. I'd date lashes if I could.
 Lashes are my favourite because they add the allure to all eyes. The smokey eye would be nothing without lashes. The cat eye would be nothing without lashes. What the F would Twiggy be without lashes?
Nothing.
So, over the years I've experimented and can finally say I've found some great tips that have not only worked on my lashes, but on all the lashes of my beautiful friends that ask me to do their makeup. The best part about lashes is you don't necessarily have to have the best of the best mascara, some of the most popular mascara's in the world are ones you'll find at the drugstore.
One.
Be kind to your lashes - this is probably the most important step. Wash your mascara off every night with a gentle eye makeup remover and avoid picking at clumps. Vaseline is a great eye makeup remover and also works as a lash conditioner
Two.
Curl your lashes. My mom doesn't use an eyelash curler and it's definitely affecting our relationship. I've explained time and time again that curling her lashes will open up her eyes, making her look more awake and giving her the ability to give a solid wink to selected Doctor's that she works with. You can get eyelash curlers anywhere; however, the best of the best and most popular curler in the world is by Shu Uemura, it's around $25 and available at Sephora.

Two point five.
This is set as a 2.5 because using a lash primer may not be a big thing for some people. Lash primers are applied before mascara and can help give your lashes some extra volume or length. I use a lash primer everyday, but only at the tips of my lashes. I used to use the primer all up my lashes, and then discovered it works better if I play a little game of just the tip. Your lashes are thinner at the tip, so putting primer only there creates a longer, more uniform lash that really stands out. If you are going to use a primer, make sure your mascara completely covers the primer, there are a lot of girls out there with black lashes decorated with random pieces of white primer, and nobody likes a speckled tip.
Three.
Apply mascara to the tips first. Just like primer, applying your mascara to the tips of your lashes first will even out the thickness, allowing your lashes to appear longer and your curl to hold better. The way you apply mascara is crucial if you love lashes as much as I do.
- holding the wand horizontally, apply mascara at the tips of your lashes, making sure to get all outer and inner corners
- place the wand horizontally at the base of your lashes and wiggle the wand back and forth as you fully coat each lash - wiggling the wand will make sure the mascara doesn't clump and you get the maximum effect. [I usually do this a couple times over my lashes] tip: while at the base of your lashes, twist the wand, letting it raise your eyelid up and touch the inner lashline - this will create the illusion of thicker lashes just like tightlining does. In a pinch? Skip eyeliner and just do this, eyeliner and thick lashes in one step. WIN.
- to get the outer lashes, keep the wand on a diagonal and "pull" the outer lashes up and out, it will give extra definition to single lashes on the outside creating the perfect flirty look
- comb through lashes with a lash comb to make sure there are no clumps. The best lash comber is the Sonia Kashuk Lash and Brow Groomer and unfortunately its available at Target. Now, there is a dupe for this but it is a) only for you girls with a very steady hand and b) available for you to try only at your own risk, I am not responsible for any damage. The SK groomer is the best because it isn't a plastic comb, if you look closely, it is a row of tiny, needle like pieces that are very sharp. So, what you can do is take a pin and open it up so it is in one straight line and c a r e f u l l y run the pin between each of your lashes - I learned this from a very good friend [thanks Lady] and it creates amazing separation of your lashes.
Four.
 Double up. I use two types of mascara every day - a thickening and a lengthening. Following the application steps above, using the lengthening mascara first. Follow steps one and two, and instead of doing multiple full swipes with the lengthening, switch to the volumizing and get a couple good swipes in there too. All makeup books and lessons will tell you to wait until each coat dries before applying another one, but this is BS. Who has time to wait in between swipes? If you do, who wants to put mascara on dry-mascara'd eyes? It works better if you layer while the mascara is still semi-wet, just make sure to run your comb through at the end to get rid of any clumps
Five.
We all make mistakes, and every single day I will have a mascara smudge on my eyes. To remove it, instead of wetting a Qtip or licking your finger and rubbing, wait until the mascara dries. Finish your makeup entirely and when you are done, take a Qtip and "flick" the mascara off. Instead of it smearing with your finger, the dry mascara will just chip off your skin leaving no smudges!
I stated in the intro that it really doesn't matter what mascara you use, especially if you aren't a fan of lashes. I, on the other hand, am a lashes freak and have compiled a top 10 list of my favourite mascaras for you.
- Giorgio Armani Eyes to Kill
- Bare Escentuals Buxom Lash
- Givenchy Phenomen'eyes
- Christian Dior Diorshow *cult favourite worldwide
- Max Factor 2000 Calorie [discontinued, RIP Max Factor]
- Blinc Kiss Me
- MAC Plush Lash
- Maybelline Pulse Perfection
- Maybelline Full n Soft *great everyday, soft lashes
- L'Oreal Extra Volume Collagen
Yes, I own all of these and yes I have more.
Yes, I use all of these - some three at a time.
Yes, it's a little over the top but I love it.
 Last but not least - I've had a lot of questions about lash enhancers - Latisse, Revitalash, etc. These are treatments designed to be applied to the lashline at night, aimed at growing your natural lashes. The only product I have experience with is RevitaLash and I used it for a good three months. I did notice a big difference using it, and it's effects seem to have kept somewhat intact. The downside to these - they are expensive and are somewhat irritating to your eyes, along with Latisse being only available by prescription. However, L'Oreal has now come out with a drugstore alternative, Lash Boosting Serum and I did purchase this. I haven't started using it yet, but will review once I have used it for a good 4 weeks.
 Second last but not least - remember the eyeliner post when I mentioned Bare Escentuals Buxom Lashliner claimed to grow your lashes? Well, aside from being the best gel liner I've ever used, it actually has done a lot for my lashes. I've noticed new growth with the lashes on my inner corners, and my lashes seem fuller and healthier as well. WIN.
Lots about lashes I know, but they're my favourite. And, this is my blog so I can make it as long as I want [that's what she wished].
Happy Family Day
xxLM
*All images courtesy of Sephora.com
Saturday, February 13, 2010
Skincare Saturday: Eyes
Welcome to the first official Try This.Buy That post! You'll notice the other posts pertaining to skincare & beauty have been imported from All My Laundry. I've decided to separate the beauty & style blogs from All My Laundry in order to maintain a consistent theme, so welcome to TTBT - ultimately created for all of you looking for hair, skin, makeup, and fashion advice who don't really care to know much about me, my Wednesdays, or my thoughts. [although I do think that's a little shallow. also a little superficial.]
 Eyes seem to be a popular answer when people are asked about their favourite features about themselves and I'm not surprised. Eyes are the first thing I notice when I meet new people and I am a huge fan of eye contact [note to self: write about inappropriate eye contact on Wednesday]. I don't think I am alone in having a special thing for eyes, and I would imagine if when I run in to Shamar Moore he will be looking deep in to my eyes, so f*ck - I'm going to take care of them.
I mentioned yesterday about the importance of using an eye cream and here's why: the skin under your eyes is much thinner and much more delicate than the rest of your face and is the first place where skin loses elasticity. Unless the moisturizer you are using all over your face is magically formulated to decipher the delicate skin under your eyes and transform itself to combat dark circles, fine lines and puffiness - you're doing your eyes a disservice. Eye creams go through a much stricter testing process than moisturizers because it must be safe if the product enters your eyes. Eye creams are not only specially formulated to be easy on the eyes [Shamar Moore], they are designed to treat puffiness, dark circles, discoloration, and fine lines.
I'm glad you've now decided you need an eye cream - now what to buy? Well, what are your concerns? For me, my concerns at the moment are puffiness, loss of elasticity, and dark circles due to my excessive drinking lifestyle. I'm more concerned with my 11's on my forehead [is 26 too young for Botox?] than fine lines around my eyes at the moment, but I'm all for preventative measures [in all areas of life fyi]. I also prefer my facial products to be light in texture as opposed to thick and creamy [um. giggles].
As always, here are the products I've had experience with, you'll see there aren't many [why does this sound like I'm implying another type of experience? That'll never come out, my mom reads this]
Garnier Skin Renew Anti-Puff Eyeroller: I liked this because it contains caffeine which really helps with circulation under your eyes, it also has a nice cool feeling to it and hey, I'm already a master at rolling my eyes, why not roll under them as well. If you are younger and are just looking for a 'freshen up' product around your eyes - this is great. If you are concerned with wrinkles, fine lines, loss of elasticity etc I wouldn't recommend this one.
Neutrogena Radiance Boost Eye Cream: Again, like the roller above - this really doesn't combat aging but I did see a difference in the brightness under my eyes which was nice. tip: I found myself using the roller and this one a couple minutes after I used my eye cream and the combination of a good all-around eye cream and a radiance boosting one was fantastic.
Laura Mercier Eyedration: I loved this. I used this until it was bone dry [just the way I like em. my cappuccinos you sicko] and I would have repurchased if I hadn't taken that one trip to shoppers with my mom and picked out the one I am currently using [for which I received numerous Optimum points]. This is your most basic all in one eye cream along with vitamins C and E to protect skin from the environment. Only downside - it's expensive, you have to dip your fingers in to it [ew], and for the same price, you can now get some eye creams that contain retinol which you now know all about!
Vichy Lift Activ CxP Eyes: this is the eye cream I am currently using and am dreading the day that it runs out due to my inability to purchase the same product twice, with a few exceptions. I love this, it has caffeine and pure Vitamin C to "detoxify the eye contour" and it really does. I've noticed firmer skin around my eyes, my dark circles have subsided, and my puffiness is reduced. I'd recommend this to all you ladies looking to tighten and brighten up - it's great.
Those are the ones I have tried, and since I am running out of my Vichy one, you can bet your a** I've been doing my research on what to purchase next and I think I've decided. Vichy's new Reti-C Eyes looks amazing - pure Vitamin C along with Retinol? Think So. The only one standing in the way of the Reti-C is the new Lift Activ Retinol Eyes - this baby is packed with Retinol and Hyaluronic Acid and looks to be pretty soothing - I'm just not sure if I need all of that since it is designed to combat three different types of wrinkles - and the only place where I have three different types of wrinkles is my thighs, and using an eye cream there would require a lot of rubbing [that's what she said].
I've always had success with Vichy products, but either way - look for an eye cream that fights all signs of aging - dark circles, puffiness, and fine lines and wrinkles. Vitamin C, E, Retinol, Hyaluronic Acid, caffeine etc are all good to have in an eye cream. If you really struggle with dark circles, try purchasing a brightening eye cream like the Neutrogena one and put it on right before you use undereye concealer - it'll help the concealer go on smoother and give a better brightening effect.
I always re-read my posts before writing my concluding paragraph to make sure that I've gotten in all the info, and the only thing that stands out is my uncanny ability to turn any discussion on any topic into something related to sex. I get that from my mother.
XxLm.
Friday, February 12, 2010
Improv Friday Cocktails...Puff Puff
No. Not that kind of puff.
I'm talking about our nice little puffy friends that pop up under our eyes in the morning.
Don't know what I'm talking about?
1. This post isn't for you and 2. You better have extra wrinkles/sun spots to compensate.
There are lots of lotions and potions out there designed specifically for the eyes to combat dark circles, fine lines, etc. I've used an eye cream for as long as I can remember and if you don't, you should. You should also read tomorrow's blog since it will revolve around eye treatments.
Today's post is centered around specifically eye puffiness which I hate. Not only is it annoying, but its a sure sign that you're tired, stressed, or felt waaaay too pretty and too funny the night before. Here are some ways to reduce puffiness should you require to do so.
I never go on trips without taking a spoon, especially work trips. For those of you who have the pleasure of working with me, you know the odds of having under-eye puffiness in the morning is about a million to one [holla]. Anyways, a spoon isn't only great to mix hangover cures in your hotel room [hot water & honey, works every.time] - spoons are great to de-puff your eyes and can be used two ways. The best way to use them is to keep a spoon in your freezer, when you wake up in the morning, gently hold the rounded end of the spoon under your eyes and on your eyelids - the cold will bring the swelling down from the inside out. No freezer? Run the spoon under cold water for a few minutes and then apply - not the same effect as a frozen spoon, but better than nothing :)
I'm a huge fan of Tbagging. Not that version you sicko, I mean Tbagging my eyes...wait, no not that either. I mean the act of putting tea bags on my eyes. Did you know that putting cold tea bags on your eyes for a couple minutes will take away puffiness and reduce dark circles? Green tea bags are the best, and chamomile is also a natural soother which also makes an impact.
 I'll have a side of fries with that. French fries are one of my fav foods, soaked in vinegar [clarify: white vinegar for you Americans missing out on the deliciousness] with salt and ketchup. Unfortunately slapping fries on your eyes [hey it rhymes!] won't do much for puffiness, but thin slices of potato will. Potatoes are high in alpha lipoic acids and can lighten circles while reducing puffiness. Want to take it up a level? Soak the potato in chamomile tea and then dip it in to aloe vera gel [the kind you slather on when you've had a wee bit too much sun] - let it rest on your eyes for a good 10 minutes and voila, bright eyes!
So there you have it - follow these tips and who knows, you may be able to fake that you're the #2 girl above, without the extra wrinkles or sun spots :)
Enjoy your Fridays
xxLM
Image courtesy of janssushibar
Monday, February 8, 2010
Makeup Monday: iLast

'Tis the start of a new week & mine is going to be a busy one. Because it's going to be a busy one, I'm going to need my makeup to last all day - so I thought I'd give you some tips on how to get the most out of your makeup, and dupe some of the most popular products.
One.
It's important that you prep your skin well and use a moisturizer suited to your skin type, especially if you have oily skin. Look for a mattifying moisturizer that can reduce your skin's oil production
Two.
Use a makeup primer. Primer helps smooth your skin, minimize pores, and can fill in fine lines. Most primers are clear, however some lines now carry corrective primers that are coloured to combat redness, dullness, sallowness etc. Cheap tip: Are you a fan of Smashbox's Photo Finish primer? It's the most popular primer in the world, well my ladies - the next time you go to repurchase, skip the cosmetics aisle and take a trip to the last place in the world you'd ever want to run in to your boss or the hottie you're currently stalking on facebook: the feminine hygiene aisle. Monistat Chafing Relief powder-gel is the exact same formula for a lot less $$. Aside from saving money, you'll be guaranteed to have an itch-free face for the rest of the day [TMI, I know, but I bet you're laughing]
Three.
I've said it before, but after your foundation - make sure you dust some translucent powder to set it. It'll stop your foundation from oxidizing (changing colour as your skin gets more oily during the day) and it will prevent your blush and bronzer from sinking into your foundation and getting muddy. Don't have translucent powder? Cornstarch is a great replacement, and works just the same!
Four.
Blot during the day to control oil - you can use blotting papers, or if you're lucky enough to work in the presence of public washrooms that supply toilet seat covers - take a few, the paper in the seat covers is exactly the same as some of the more expensive tissue-form blotting papers. WIN
Five.
& most important - STOP TOUCHING YOUR FACE :) I have an awful habit of touching my face during the day and I try my hardest to stop. All of the dirt on your pretty little hands goes straight in to your pretty little pores and clogs them, creating your skin to produce more oil.
So there you go, five simple tips to prolong your pleasure.
I mean your pleasure with yourself.
I mean your pleasure with your face.
You get it.
xxLM
Picture courtesy of Style.com
Subscribe to:
Comments (Atom)